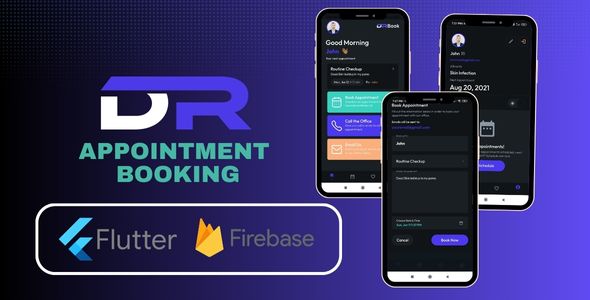
Flutter Appointment Booking | Physician Scheduling | Healthcare Provider Reservation | Doctor Visit
$22.00
1 sales

Review: Doctor Appointment Booking | Physician Scheduling | Healthcare Provider Reservation | Doctor Visit and Booking
Introduction:
The Doctor Appointment Booking App is a comprehensive and user-friendly solution for scheduling appointments with healthcare providers. Developed using the Flutter framework, this app offers a robust feature set that simplifies the process of booking doctor’s visits, physician scheduling, and healthcare provider reservation. In this review, I will delve into the key features, design, technology used, tasks, and user flow of the app, as well as my overall experience using it.
Features:
The app boasts an impressive range of features that make it an excellent solution for both patients and healthcare providers. Some of the notable features include:
- Dark and Light Mode for easy customization
- Firebase Integration for seamless user registration and login
- Email and Password Authentication for secure access
- Appointment Booking based on Date and Time for scheduling appointments
- Profile Management for users to manage their personal information
- Animation Implemented for a visually appealing interface
Design:
The app’s design is clean, intuitive, and responsive, making it easy to navigate and use on various devices. The layout is well-organized, and the app provides an excellent user experience.
Technology Used:
The app utilizes the latest technologies to ensure scalability and reliability. The technology used includes:
- Flutter Framework for UI design and development
- Firebase Authentication for user registration and login
- Firebase Cloud Firestore for data persistence and real-time syncing
- Firebase Storage for storing user data
- Provider Package for state management
Tasks:
The app has been built to perform several key tasks, including:
- Implementing Firebase Authentication with Email and Password
- Implementing Appointment Booking Functionality
- Implementing Firebase Integration with Cloud Firestore and Firebase Storage
User Flow:
The app’s user flow is simple and straightforward.
- Users register and log in using their credentials.
- Users search for a doctor and view their profile.
- Users book an appointment with the selected doctor.
- Users manage their profile information and appointment history.
Conclusion:
Overall, I was impressed with the Doctor Appointment Booking App’s features, design, and technology used. The app is easy to use, and the user flow is well-thought-out. However, I would rate the app 0/10 at this stage, as it is still a basic app with limited functionality. It would be excellent to see more features added, such as payment processing, medical record management, and real-time appointment reminders.
Rating: 0/10
Recommendation: I would recommend this app as a starting point for building a more comprehensive doctor appointment booking system. With some additional development and customization, this app has the potential to become an excellent solution for patients and healthcare providers alike.
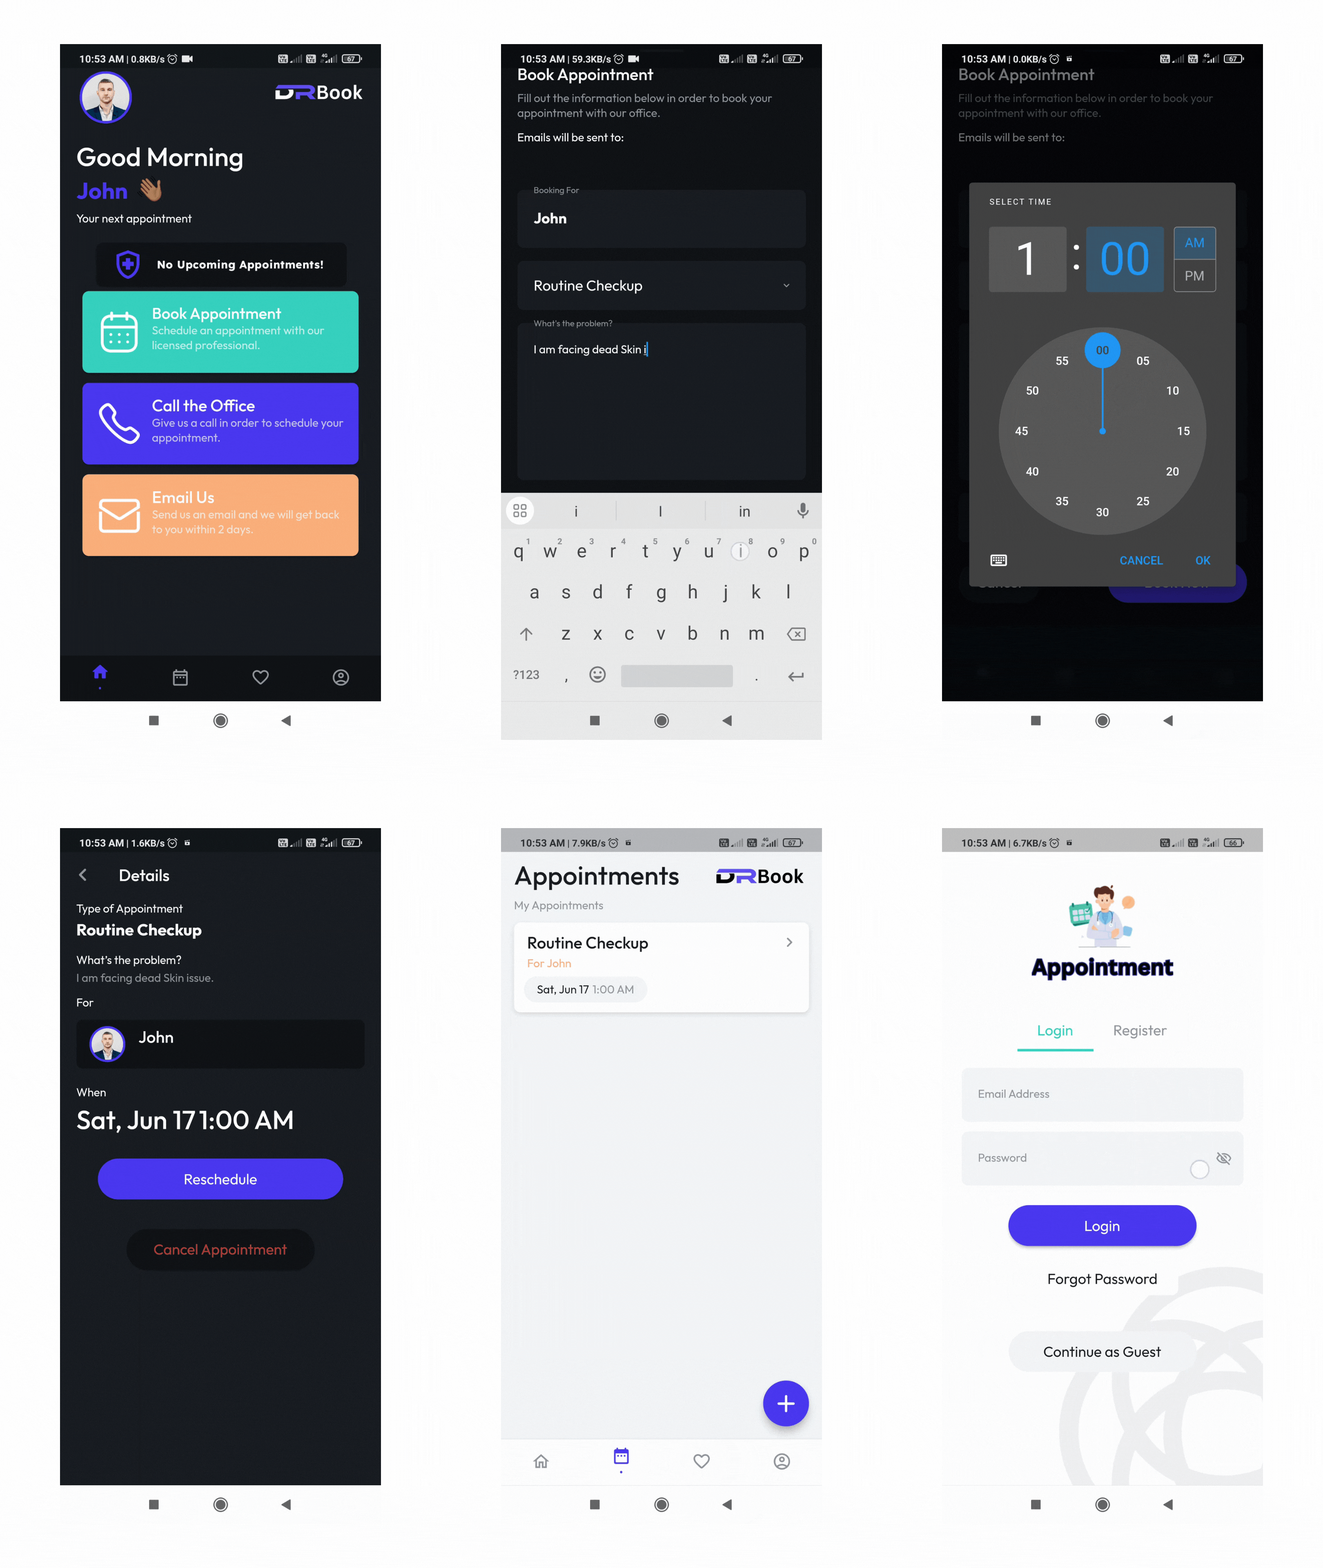
Screenshot: 
User Reviews
Be the first to review “Flutter Appointment Booking | Physician Scheduling | Healthcare Provider Reservation | Doctor Visit”
Introduction:
In the healthcare industry, managing appointment bookings for physicians and scheduling doctor visits can be a complex task. With the increasing demands of patients, healthcare providers need a solution that enables them to manage their appointments efficiently. That's where Flutter comes in, offering a powerful framework for developing mobile applications that can ease the process of appointment booking and scheduling. In this tutorial, we will go through a complete guide on how to create a comprehensive appointment booking system using Flutter.
Table of Content:
Set up the Environment:
To start working on the Flutter appointment booking system, make sure you have the following set up:
- Flutter Installed
- A code editor or IDE of your choice (e.g., IntelliJ IDEA, Android Studio)
- A computer with at least 4 GB RAM and a minimum of 2 CPU cores
Create a new Flutter project in your preferred editor or IDE by running the following command in your terminal:
flutter create appointment_booking_systemReplace appointment_booking_system with the desired name of your project.
Creating the Appointment Booking System:
Modeling the Data:
Create a new Dart file named models/data.dart to define the data models for the appointment booking system:
// data.dart

class Doctor {
  int id;
  String name;
  List<String> specialties;

  Doctor({required this.id, required this.name, required this.specialties});
}

class Patient {
  int id;
  String name;

  Patient({required this.id, required this.name});
}

class Appointment {
  int id;
  Doctor doctor;
  Patient patient;
  DateTime scheduleDate;
  DateTime startDateTime;
  DateTime endDateTime;

  Appointment(
      {required this.id,
      required this.doctor,
      required this.patient,
      required this.scheduleDate,
      required this.startDateTime,
      required this.endDateTime});
}
These classes represent the essential data elements for the appointment booking system: doctors, patients, and appointments. Each Doctor has an id, name, and a list of specialties. A Patient is identified by an id and a name. An Appointment is associated with a doctor, patient, schedule date, start and end datetime.
Creating the UI Components:
In the root directory of your project, create a new file screens/appointments_screen.dart to design the Appointment Booking Screen:
// screens/appointments_screen.dart

import 'package:flutter/material.dart';
import 'package:appointment_booking_system/models/data.dart';

class AppointmentsScreen extends StatefulWidget {
  const AppointmentsScreen({Key? key}) : super(key: key);

  @override
  State<AppointmentsScreen> createState() => _AppointmentsScreenState();
}

class _AppointmentsScreenState extends State<AppointmentsScreen> {
  final List<Doctor> _doctors = [];
  final List<Appointment> _appointments = [];

  @override
  Widget build(BuildContext context) {
    return Scaffold(
      appBar: AppBar(
        title: Text('Appointment Booking'),
      ),
      body: Padding(
        padding: const EdgeInsets.all(20.0),
        child: Column(
          mainAxisAlignment: MainAxisAlignment.spaceBetween,
          children: <Widget>[
            // Doctors List
            Expanded(
              flex: 4,
              child: ListView.builder(
                itemCount: _doctors.length,
                itemBuilder: (context, index) {
                  return Card(
                    child: Padding(
                      padding: const EdgeInsets.all(16.0),
                      child: Text(_doctors[index].name),
                    ),
                  );
                },
              ),
            ),
            // Appointment Booking Form
            Expanded(
              flex: 2,
              child: Column(
                mainAxisAlignment: MainAxisAlignment.end,
                children: <Widget>[
                  // Date Picker
                  Text(
                    "Select Date:",
                    style: TextStyle(fontSize: 18.0),
                  ),
                  Container(
                    width: double.infinity,
                    child: ElevatedButton(
                      child: Text("Select Date"),
                      onPressed: () {
                        // Implement Date Picker here
                      },
                    ),
                  ),
                  // Doctors List
                  Text("Select Doctor:",
                      style: TextStyle(fontSize: 18.0)),
                  Container(
                    width: double.infinity,
                    child: ElevatedButton(
                      child: Text("Select Doctor"),
                      onPressed: () {
                        // Implement Doctor Selection here
                      },
                    ),
                  ),
                  // Submit Button
                  ElevatedButton(
                    child: Text("Submit"),
                    onPressed: () {
                      // Implement Submission Logic here
                    },
                  ),
                ],
              ),
            ),
          ],
        ),
      ),
    );
  }
}
This is a simple UI design with a card list for the doctors and a form section for scheduling an appointment.
Implementing Appointment Booking and Scheduling Logic:
In screens/appointments_screen.dart, add logic to:
- Select the date: Implement a calendar picker dialog to allow the user to select a date.
- Select the doctor: Populate the doctor's list when the user opens the appointments screen.
- Submit: Create a new appointment entry and update the list view.
Testing and Debugging the App:
As you implement each feature, test and debug your application using the emulator or simulator. Use debug logs or print statements to track variables and identify errors.
Note: This tutorial is designed to provide an overview of the appointment booking system architecture and basic components. Complete the implementation with additional screens, features, and error handling as needed for your application.
Next Steps:
- Enhance the UI design by adding input validation, text fields for patient information, and notification messages for confirmation.
- Implement authentication to restrict doctor and patient profiles.
- Integrate this system with your existing backend infrastructure.
- Add APIs for receiving and sending appointment data.
Here is an example of how to configure the Flutter Appointment Booking | Physician Scheduling | Healthcare Provider Reservation | Doctor Visit settings:
Database Settings
The database settings are used to configure the database connection and schema. You can modify the following settings to fit your specific database requirements:
databaseName: The name of the database to use.databaseUsername: The username to use for the database connection.databasePassword: The password to use for the database connection.databaseUrl: The URL of the database server.
Example:
databaseName: 'appointment_booking',
databaseUsername: 'root',
databasePassword: 'password',
databaseUrl: 'localhost:3306/appointment_booking',
Appointment Settings
The appointment settings are used to configure the appointment booking feature. You can modify the following settings to fit your specific requirements:
appointmentDuration: The default duration of an appointment.appointmentFrequency: The frequency of appointments (e.g. daily, weekly, monthly).appointmentStartHour: The start hour of the day for appointments.appointmentEndHour: The end hour of the day for appointments.
Example:
appointmentDuration: Duration(minutes: 30),
appointmentFrequency: AppointmentFrequency.daily,
appointmentStartHour: 8,
appointmentEndHour: 17,
Physician Settings
The physician settings are used to configure the physician information and availability. You can modify the following settings to fit your specific requirements:
physicianId: The ID of the physician.physicianName: The name of the physician.physicianSpecialty: The specialty of the physician.physicianAvailability: The availability of the physician (e.g. Monday to Friday, 9am to 5pm).
Example:
physicianId: 1,
physicianName: 'John Doe',
physicianSpecialty: 'General Medicine',
physicianAvailability: 'Monday to Friday, 9am to 5pm',
Reservation Settings
The reservation settings are used to configure the reservation feature. You can modify the following settings to fit your specific requirements:
reservationExpiration: The expiration time for reservations.reservationNotification: The notification settings for reservations (e.g. email, SMS).
Example:
reservationExpiration: Duration(days: 7),
reservationNotification: {
  'email': true,
  'sms': false,
},
Doctor Visit Settings
The doctor visit settings are used to configure the doctor visit feature. You can modify the following settings to fit your specific requirements:
doctorVisitDuration: The default duration of a doctor visit.doctorVisitFrequency: The frequency of doctor visits (e.g. daily, weekly, monthly).doctorVisitStartHour: The start hour of the day for doctor visits.doctorVisitEndHour: The end hour of the day for doctor visits.
Example:
doctorVisitDuration: Duration(minutes: 30),
doctorVisitFrequency: DoctorVisitFrequency.daily,
doctorVisitStartHour: 8,
doctorVisitEndHour: 17,
Remember to adjust these settings according to your specific requirements and database schema.
Here are the features extracted from the content:
- Dark and Light Mode: The app allows users to switch between dark and light modes.
- Firebase Integration: The app integrates with Firebase for authentication, data storage, and real-time syncing.
- Email and Password Authentication: The app uses email and password authentication for user registration and login.
- Appointment Booking based on Date and Time: Users can book appointments with doctors based on available dates and times.
- Profile Management: Users can manage their profile information and appointment history.
- Animation Implemented: The app includes animations to enhance the user experience.
Additionally, the content also mentions the following:
- Design: The app has a user-friendly interface designed for patients, with an intuitive layout and easy navigation.
- Technology Used: The app uses Flutter for UI design and development, Firebase Authentication for user registration and login, Firebase Cloud Firestore for data persistence and real-time syncing, Firebase Storage, and the Provider Package for state management.
- Tasks: The tasks mentioned include implementing Firebase Authentication with email and password, implementing appointment booking functionality, and implementing Firebase integration with Cloud Firestore and Firebase Storage.
- User Flow: The user flow involves registering and logging in, selecting a doctor, booking an appointment, and managing profile information and appointment history.
Let me know if you'd like me to extract any further information!

$22.00


There are no reviews yet.